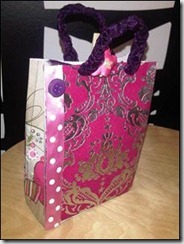
Get creative: How to make a gift bag or box from old greeting cards
If you’re anything like me you will have stacks of old greeting cards gathering dust in the back of a cupboard or under your bed. And let’s face it you are never going to read them again so why not do something useful with them and create a gift bag? It’s easy so let’s get started.
What you need:
Selection of old greetings cards
Template (I used the one from this site)
Scissors
Holepunch
Cellotape/Stapler/Glue
Ruler
Ribbon/bottons (optional)
Print the template out on A3 paper or larger depending on the size you want your bag/box to be. If you want to make a box you will need all the tabs but tabs H and G aren’t necessary for a gift bag.
Decide on the theme of you bag/box and discard any cards or sections of a card that can’t be used.
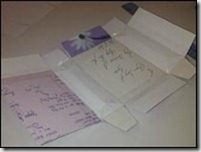
Cut around the template and lay on a flat surface. Make a note of the measurements for each section and then use those measurements to cut out accurate shapes from the cards. Make the side pieces (D) an extra 1cm wider so you can fold them later on. Choose your designs carefully, particularly for sections B, C and both D’s because these will be visible once the bag/box is finished.
Take both side pieces (D) and fold them in half vertically. This will form the crease in the side of the gift bag. Draw two lines at each end, forming a triangle. Use scissors to score these lines.
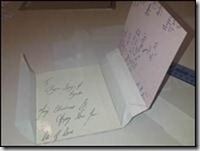
Lay all the card pieces facedown and carefully begin to attach them together using Cellotape. Try not to overlap the pieces. Instead allow several layers of Cellotape to join the sides together. The flexibility of the Cellotape will allow all the pieces to fold easily.
Once all sections are joined the bag/box will begin to take shape. Put Cellotable or glue on tab A and fold it over, attaching the sides together, forming an open ended box. If you are making a box avoid gluing this end tab because it forms the opening of the box; instead just close both ends instead using tabs E, F, G and H.
Close the bottom (and the top if you are making a box) using Cellotape or glue. You now have your gift bag. Fold the sides to make the bag a better shape.
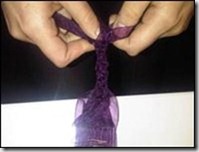
Use the holepunch to make holes for the handles, which you can make from ribbon. I plaited ribbon but this isn’t necessary. Feed the ribbon through the holes or attach with a stapler.
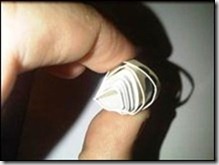
 Note: If you don’t have any ribbon you can use another greeting card to make beads. Draw vertical lines on an opened card – gradually getting wider. Cut along the lines and then roll from the wider end. Use glue or Cellotape to attach the thin end to the coil. This effect creates a bead like shape and you can feed these onto string.
You can tidy up the bag and hide any Cellotape that might be visible by adding extra detail like ribbon or buttons.
Tag – This part is the easy bit. Find a card with something pretty on, cut out the section you want, hole punch just one hole and make a loop using ribbon or string.


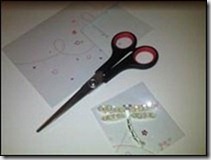
 Attach the tag to the bag and then all you need is a present to fill it and a greeting card. You can even buy these without leaving the house – just visit a site like Hallmark and get a person
Patience Grows with Age!
When I started my blog about 2 months ago, I also wrote my list of 101 things to do in 1001 days and I have been doing really well at crossing things off. I haven’t mentioned it for a while because what with starting work time just hasn’t been on my side. But don’t worry I am still working towards them!!
So last weekend the girls were meant to be with Daddy for the weekend, but due to the Volcanic Ash Cloud, he didn’t make it back in time. It meant however, that I had no plans as to what we would do with our weekend. I had to go to the local Warehouse store to get some craft bits and pieces for work and, wait for it, I bought paint! Oh no hang on, I mean for MY girls not for work!!! Yep, I decided the time had come that I would brave letting the girls do painting at home!!! Guess what, yep, they loved it. B was in shock that I was letting them do it and H spent the whole afternoon saying “painting”!!


The thing that really got me though, wasn’t the fact that it made a mess, because it didn’t. It wasn’t the fact that I didn’t have a clue how to help them to do it, because I let them both take the lead. The thing that was surprising was the amount of patience I had with the whole activity and it got me wondering if that’s just an age thing or if it’s another sign of how I have changed in a person over the years. To show what I mean, when B was the age H is now, I went to work part time and she went to nursery. This is no different with H, although my working pattern now is much more family friendly. I didn’t work weekends, again that’s the same now. We lived hundreds of miles away from family with mountains and the sea all within 10 minutes of us. However, when it came to doing kid things with B, like crafts and painting, I just had no patience at all. 
Ok since then a lot has changed and I am not even going to begin to try and pinpoint why things have changed in this area, but we now play with playdough, moon sand, painting, drawing. We don’t just do these activities but all three of us love it! Maybe it’s because it is second time round too. I do feel guilty now when I pull out the craft stuff and B is trying things for the 1st time with H, yet H will grow up with these activities always having been in her life!!
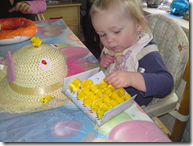
As you can see from the pictures we had a few different things to use with the paints. Of course there were brushes, but as well we had sponges and some plastic cutlery. Now back when B was little I wouldn’t have even had the imagination to use these different objects in a painting session! And the pictures the girls did now have pride of place on the kitchen door!
So anyone out there who shies away from doing such craft activities at home, give it a go. Honestly the negatives that put you off are nothing compared to the enjoyment you will get from it! Make sure you put down newspaper or a plastic sheet to protect the table, and if you have a carpet then maybe a plastic sheet to protect that too. If it’s laminate flooring, well I took the risk and the few paint splashes washed off easily. Real worst case scenario the kids end up in the bath, so just make sure you allow time for this just in case!! If I can do it and enjoy it then so can you!!
Our 1st Family Craft Day
I love crafting. I enjoy card making – just don’t get as much time as I would like. Over the  years I’ve done various different things. Crafting with the kids is something I’ve always had issues with though. Why? Because I get frustrated they don’t do it "right". However, after conversations with other mum’s and reading other blogs I realised that crafting can be fun even when letting the kids take the lead!
First up was playdough…..homemade at one of the workshops at the local Children’s Centre, away we went!
The recipe was really simple :
2 Cups Flour, 1 Cup Salt, 2 Tablespoon Cream Of Tartar mixed together, then add 2 Cups Boiling Water, 1 Tablespoon Vegetable Oil and Food Colouring and mix well.
I’ll be honest I had seen recipes before which involve boiling it all in a pan etc, but this was so simple I would definitley do it again. The girls both enjoyed it, H took her time to touch it, I plonked a piece in front of her and she poked at it with the chopsticks and spoons, but didn’t hold it till I passed her a piece and then she was well away. B on the other hand was straight in their. Neither of them built anything, H was happy just to get used to the feel of it and poke at it while B tried to be creative and then just ended up squeezing it, breaking it up and squishing it back together. I grinned and beared the fact I hate the feel of the stuff and joined in a little, then when H started trying to eat it I knew it was time for lunch!!
After lunch was Easter bonnet time. H had a nice straw hat to decorate, B on the other hand decided she didn’t want one of those but would use a polystyrine ring and decorate it. The only thing I did for H was put the glue on – I wasn’t brave enough to let a 19 month old loose with PVA! Plus it meant I got my hands covered in glue!! Anyway, H picked her decorations, told me where to put the glue and then stuck each piece in place, which B was let loose. I gave her a bit of guidance when she realised what she was doing wasn’t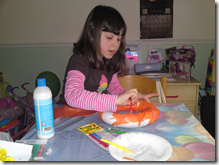 working how she wanted. But I tell you what we had so much fun! I am definitly glad I have finally done this. I have never seen them both involved in the same activity and playing really well together like they did today. And, the big one for me, the laptop has been switched off for most of the day! I’m already planning our next crafting activity – paints!!!! I’m in shock that I am actually really looking forward to it!
So, for anyone out there who is like I was and wary of letting the kids do “messy” things at home, go for it, if I can brave it and enjoy it so can you! And if you have any ideas for me to try with the girls I’m ready to give things a try now!!
-
Archives
- February 2013 (3)
- January 2013 (24)
- November 2012 (11)
- October 2012 (6)
- September 2012 (2)
- August 2012 (1)
- July 2012 (1)
- June 2012 (1)
- May 2012 (1)
- March 2012 (4)
- February 2012 (4)
- January 2012 (1)
-
Categories
- Blogging
- Christmas
- Current Affairs
- Entertainment
- Family Life
- Food
- Friendship
- Guest Blog Post
- Health
- Home
- Me, myself and I
- meme
- Mummy Tummy Begone
- My 101 Things
- Parenting
- Product Reviews
- Race for Life
- Religon
- School and Childcare
- Secret Post Club
- Song Saturday
- The Gallery
- TV
- Uncategorized
- Working Mum
-
RSS
Entries RSS
Comments RSS


